Thursday, April 24, 2008

Lemon Pound cake

Ever since I saw the 10-shilling cake at Food,In the main, I have been waiting to try it. I got the perfect oppurtunity when we decided to take a road trip to STL to visit my BIL and family there. I did double the recipe since I had 10 inch bundt pan. I changed the method of making the recipe. Here is the recipe,

Lemon Pound Cake
Ingredients
1 cup butter, softened
2 cup sugar
4 eggs
2 tsp vanilla
3 cups sifted flour
1/2 tsp baking powder
1/2 tsp baking soda
1/4 tsp salt
1 cup buttermilk
Juice of two lemons
Grated lemon rind od two lemons

Instructions


  1. Pre-heat oven to 350F. Butter and flour a 10 inch bundt pan.

  2. Combine all dry ingredients in a mixer bowl and stir them together.

  3. Add butter, vanilla, buttermilk and lemon juice to this.

  4. Beat the mixture at stir speed for a minute.

  5. Beat the mixture at medium-high speed for about 2 mins.

  6. Turn the speed to low and add one egg at a time with 15 seconds between the additions.

  7. Turn to medium speed for about 30 seconds

  8. Fold in the lemon rind

  9. Pour the batter into the prepared pan and bake for 1 hr and 15 mins.

You can mix 1 cup icing sugar with lemon juice to make a glaze and pour it over the cooked cake. The cake was very flavourful.


Friday, April 18, 2008

Sugar Cookies

Its our friend's daughter's fourth birthday today. And it was Teacher Appreciation day at my son's school. I had to make something quick and easy. So, I made sugar cookies. Then I iced them and spelled out the message by painting the cookies. I used the sugar cookie recipe in the Kitchen Aid mixer Recipes book. I did make some changes to it due to inavailabilty of some ingredients.

Sugar Cookies
Ingredients:
1 Cup Butter
1/2 tsp Almond extract
1/2 tsp Orange extract
3/4 cup sugar
2 eggs, beaten
1 tsp cream of tartar
1/2 tsp baking soda
1/2 tsp Green Cardomon pwd
1/4 tsp salt
2 cups All purpose flour

Instructions
  1. Pre-heat oven to 400F.
  2. Combine all the dry ingredients except the sugar in a medium bowl.
  3. Place butter and extracts in a mixer bowl.
  4. Using the flat beater attachment, beat this mixture at medium speed till smooth and creamy, about 2 minutes.Stop and scrape the bowl.
  5. Turn the beater to medium speed and gradually add 3/4 cup sugar and mixing well till blended about 1.5 minutes
  6. Add the eggs and beat for about 30 seconds. Stop and scrape the bowl.
  7. Stir in the dry ingredients and mix till well blended.
  8. Spray the baking sheet with PAM and drop teaspoonfulls of dough abour 3 inches apart.
  9. Bake this in the oven for about 6 to 8 mins.
  10. Sprinkle sugar when the cookie is still hot.

I omited the last step since I was going to ice the cookies. I got the icing recipe from here. The icing was perfect. Once the cookies were cool, I iced them. When the icing was hard, I mixed some water with red icing gel and painted the message on top of the cookie.

Here is how it looked,

Thursday, April 17, 2008

Achappam - Rose Cookies

Last christmas I invited all our friends for a tea party. Since my MIL was here with us, we were able to make a lot of Christmas 'palakarams' . The party was a hit. But, there was one 'palakaram' which was total disaster. Women from Nangil Nadu are known to make a mean kho-khos, better known acchappam,. Since both of us hail from Nangil Nadu, we could not believe that it stumped us. Acchappam would not fall from the mold and even if it did it was shriveled. Believe me, when I say that it was a total disaster.

Its been three months since our last disaster and I was not about to give up on it. So, I tried to make it again today. And what do you know,a disaster again!!! It was same problem. The acchappam will not fall off the acchu. I thought that there might be some problem with the acchu itself. I was lucky this time since my aunt who is visiting from India lives close to us. And she has an acchu which she regularly uses to make acchappam. So, I went and borrowed her acchu. And Voila!! Perfect acchappam.

Now for the recipe itself, I found lot of receipes for Acchappam all over the net. But I used this recipe to try my hand at acchappam again. I did make some changes to it. Here is how I made it,

Acchappam

Ingredients
Rice flour - 1 Cup
Coconut milk - 1 Cup
Sugar - 1/4 cup
Salt - 1 pinch
Baking soda - 1 pinch
Egg - 1
Oil for frying

Instructions
  1. Beat the egg well
  2. Mix rice flour, sugar, baking soda and salt
  3. Add the beaten egg and coconut milk to this and mix well.
  4. The batter will be resemble a thick dosa batter
  5. Place the acchu in the oil and heat the oil(This is very important, heat the oil and acchu together)
  6. Once the oil is meduim hot, place the acchu in the batter till its 3/4th covered
  7. Place the acchu in hot oil.
  8. Oil will bubble a lot and then die down. Acchappam will fall off by itself or you can give it a light shake
  9. Once its light brown, take the acchappam out and drain the oil.
  10. Acchappam is ready!!

You need to have a good acchu to make acchappam. If you can beg/borrow/steal from you Mom/GrandMom/Aunt, DO IT!! The acchu I brought from India was lightweight and useless. If you are buying it new, make sure its of beal metal and heavy. Before you use it for the firsttime, place the acchu in kanji thanni (water from boiling rice in it ) for a 2 weeks. That is supposed to season the acchu. Once you have made acchappams, DO NOT wash the acchu. Just wipe the acchu with a soft cloth to remove excess oil.

Wednesday, April 16, 2008

Mushroom Peas Pulao

For Tamil New year, we had a heavy lunch at our friend's place. I did not want to make something heavy for dinner. I have been wanting to make Mushroom Peas Pulao by Meena at Hooked on Heat. Just the color of it was tempting. So, I picked up some mushrooms and made Mushroom peas pulao. I served it with plain onion raitha. It was the perfect way to end the day and was a great hit. I did halve the recipe but followed the recipe to a T. Here are some of the pictures. I'm sending this also to MBP - April - One Pot Wonders hosted by Pavani at Cook's Hideout .

Sunday, April 13, 2008

Eggless Chocolate chip cookies

Happy Tamil New Year and Happy Vishu!!!! We were invited for lunch by our family friend for Tamil New year. They are vegetarians. So, I thought I will make eggless chocolate chip cookies. I searched for 'eggless chocolate cookies' in the net. All the recipes I found were for crispy cookies. I like chewy soft cookies. The basic recipe I used was from BHG cooking book. I used the tips I got from the net to make the cookies. The end recipe was a soft and chewy cookie. You can do lot of experimenting and variations with this recipe. You can add cashew to make this cookie with nuts. You can omit cocoa pwd and substitute regular chocolate chips. Here is the recipe,

Eggless Chocolate Chip Cookies
Ingredients
All purpose Flour - 1 1/4 cup
Cocoa pwd - 3 Tbsp
Butter - 6 Tbsp
Oil - 2 Tbsp
Sugar - 1/2 cup
Honey - 1tbsp
Baking soda - 1/4 tsp
Yougurt - 1/4 cup
Vanilla - 1/4 tsp
Orange extract - 1/4 tsp
White chocolate chips - 1 cup


Instructions:


  1. Pre-heat oven to 375 degrees F


  2. Cream butter in a mixing bowl using an electric mixer till fluffy


  3. Add oil to this and beat some more


  4. Add sugar and honey and beat it till well mixed


  5. Add yougurt, vanilla and orange extract and beat well


  6. In a bowl, mix flour, cocoa pwd and baking soda


  7. Add this to the butter mixture and mix till combined


  8. Fold in the white chocolate chips


  9. Drop teaspoon-full of batter on unlined cookie sheet


  10. Bake the cookies in the pre-heated oven for 9 - 11 minutes
The resulting cookie was crispy on the outside and soft and chewey on the outside. When we went for the lunch, the kids were ecstatic when I gave them the cookies. Their Mom is an exceptional cook but baking evades her. I promised them that I'll send them the cookie recipe. I love it when kids go crazy over the simplest things.

Friday, April 11, 2008

Easy Pineapple Dessert

Have I told you that I'm addicted to anything sweet. With dinner over, I was back to the dilemma of what to have for dessert. With the cake I made all gone, there was no dessert in sight. So, I made this easy pineapple dessert. I had this for the first time when I was pregnant with my first child and I have been addicted to it ever since. I got the recipe from one of my friends. Here it is,


Easy Pineapple Dessert

Ingredients
Pineapple Chunks - 1 can
Condensed Milk - 1 can
Evaporated Milk - 1 can
Egg - 1


Instructions
  1. Beat the egg in a small casserole or baking dish
  2. Add evaporated milk to this and mix well
  3. Add drained pineapple chunks to this and mix again
  4. Pour condensed milk on top of this and mix it lightly
  5. Pre-heat oven to 350 degrees F
  6. Bake the mixture for 35 to 45 mins, till light brown on top

This is an easy dessert. You can make it whenever you want make something sweet.

Thursday, April 10, 2008

Aloo- Peas Paratha

My skill at making chappathis/parathas is limited. I can make soft but shapeless chappathis. That is the extent of my skills. Stuffed parathas are way out of my league. But I couldn't resist trying it when I saw the Aloo parata at En Samayal Pakam . I found another interesting looking Aloo Paratha at Mane Adige . The below recipe is inspired by both.

Aloo - Peas Paratha
Ingredients:
For dough:
Durum Atta- 2 cups
salt- 1/4 tsp
warm Milk - 1/4 cup
Yougurt - 1 tbsp
Oil - 2 tsp
water- as required
For stuffing:
potato-1 (boiled)
Shallot - 1 small, chopped
Chili pwd - 1/4 tsp
Turmeric pwd - a pinch
Any masala you have (I used rajma masala) - 1/4 tsp
Frozen peas - a handful
Oil - 1 tsp
Salt - To taste
Instructions:
  1. Mix all the ingredients for the dough together. Add warm water little by little and knead well to make dough. Wrap it in plastic wrap and set aside.

  2. Heat 1 tsp oil in a pan. Add chopped shallot and fry it it starts to turn brown
  3. Add chili pwd and turmeric pwd and fry till the raw smell goes away=
  4. Add the frozen peas and saute till cooked
  5. Add the cooked potaoes and saute till the masala coats the potatoes
  6. Transfer the mixture to a bowl and mash well


  7. Take a big-lemon sized dough and split it into two.
  8. Roll the two small balls into small parathas
  9. Place a teaspoon of mashed potato mixture in the middle of one of the parathas and spread it around


  10. Place the second paratha on top


  11. Use the rolling pin to seal the parathas and together


  12. Heat tawa and cook paratha on both sides

Here is the result. I served it for dinner with egg curry.


Sunday, April 6, 2008

Spicy Chicken Biyani

I usually make biyanis in dum style. But my Mom and MIL always make it in the pressure cooker. Since dum biyani calls for at least 3 different pans, I wanted to try the pressure cooker way. My plan was to make mutton biryani from Live to Eat. Since I did not get decent mutton, I made the Spicy Chicken Biryani from Cooking 4 All seasons. I did modify the recipe a teeny weeny bit because I did not have mint and I had to make the recipe for 8 people. Here is how I made it

Spicy Chicken Biryani
Ingredients
For Marinade:
Chicken - 1 lb
Yogurt - 1 cup
Chili powder - 2 tsp
Coriander powder - 2 tsp
Turmeric powder a pinch
Garlic - 4 - 5 pods
Ginger - 1 inch
Coriander leaves - 1/2 cup
For Rice:
Basmati Rice - 2 1/2 cup
Onions - 2.5
Green chillies - 4
Ginger Garlic paste - 2 tsp
Cinnamon - 2"
Bay leaf - 1
Cloves - 4
Cardamom - 2
Salt to taste
Oil - 1 tbsp
Ghee - 2 tbsp

Instructions

  1. Clean chicken and cut into required pieces
  2. Grind coriander leaves, ginger and garlic into a coarse paste
  3. Mix the chicken with yogurt, chili pwd, coriander pwd, turmeric pwd and the cori-ginger-garlic paste. Leave it for 15 - 20 mins


  4. Clean and soak the rice for 15 mins
  5. Slice onions and chilies lengthwise
  6. Heat ghee and oil in a pressure cooker
  7. Add the whole spices and fry for 15 secs
  8. Add the sliced onions
  9. Fry till light brown
  10. Add ginger- garlic paste and chilies
  11. Fry till the raw smell goes away
  12. Add the chicken along with the marinade
  13. Cook in high flame for 5 mins and simmer till oil comes out
  14. Add the rice and mix
  15. Add 5 cups of water and salt
  16. Turn the flame to high and bring it to boil
  17. Close the cooker and place the weight once the steam comes out forcefully
  18. Lower the flame and cook for 12 mins
  19. Switch off the flame and open the cooker once the pressure is off by itself

The biryani was spicy and tasty. I am definitely make it again. I served it with mutton cutlets and onion raitha. I'm sending this for One-Pot wonders hosted by Pavani at Cook's hideout .


Thursday, April 3, 2008

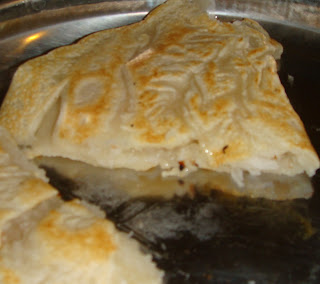
Sweet Maida dosai

I'm addicted to anything sweet. I have not come across a sweet I did not like. Anyway, I wanted to have something sweet after dinner today. I could have had a piece of cake which I made couple of days back. But then I wouldn't have anything to write in this blog and participate in Dosa Mela :). So, I made sweet maida dosai. When I told the recipe to my MIL, she told me that it resembled Surul appam. I checked it out and it is very similar. So, much for thinking that I 'invented' a recipe :) . So, anyway, here is how I made the dosai,

Sweet Maida Dosai

Ingredients
All Purpose flour - 1/2 cup
Rava - 1/4 cup
Water - 1/2 cup
Yogurt - 1/4 cup
Baking soda - a pinch
Salt - a pinch

For stuffing
Shredded coconut - 1/2 cup
Sugar - 1/4 cup (or to taste)

Instructions
  1. Place flour, baking soda, salt and yogurt in a bowl
  2. Whisk them together by adding water gradually to prepare the dosai mix.
  3. Set this aside and combine coconut and sugar together. Adjust the sugar to your taste. This is very sweet.

4. Heat dosa tawa and once its hot, pour a ladle of the dosai mix.

5. Immediately top the dosai with 1/4 cup of the coconut mixture

6. Cover the dosa tava and cook the dosai.

7. It will be done within a minute or so.

8. Fold the dosai in half and press hard. There is no need to flip the dosai.


This goes to Dosa Mela hosted by Srivali at Cooking 4 All Seasons .

Wednesday, April 2, 2008

Garlic

Garlic is an amazing vegetable with many medicinal uses and health benefits. Its botanical name is Allium sativum L. It is believed to be a powerful anti-carcinogen. It is a powerful antibiotic. It is supposed to increase milk supply for nursing mothers also. This garlic milk recipe comes from my Mom.

Garlic Milk

Ingredients
Milk – 1 cup
Garlic – 3 pods roughly chopped

Instructions

  1. Place the milk in a pan and bring it to boil
  2. Add the chopped garlic and boil till garlic becomes soft
  3. Let it cool down a bit and add sugar to your taste. Drink the milk along with the cooked garlic.


My Father-in-Law has the below date-garlic couple of days a week in the morning to prevent cholesterol. He said that the date is to cut through sharpness of garlic. While this is not the only healthy habit he has, he is a very healthy and fit 75 years old.

Date - Garlic

Ingredients
Garlic – one small pod or half of a large pod peeled
Dates – 1

Instructions

  1. Slit the date in the middle and remove the pit.
  2. Place the garlic pod inside the date
  3. Eat the date-garlic


I’m submitting both these recipes for April JFI - Garlic hosted by Mathy of Virundhu

Tuesday, April 1, 2008

Banana date cake

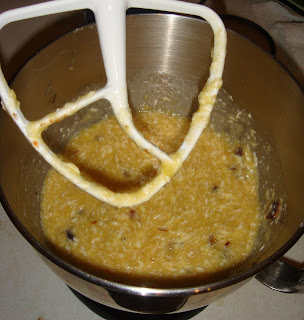
I was craving for something sweet today. I was just going to settle for a plain pound cake and enjoy it. But DH did not want something ‘plain’. He wanted something with orange and nuts in it. There were no oranges or nuts. Then I remembered that I had cashew nuts in the pantry. I always have cashews since you never know when you have to make a last minute dessert. I adapted the Granny cake recipe from the Better Home and Gardens New baking book to make this cake.

Banana-Date cake (adapted from Granny cake recipe from BHG New Baking book)

Ingredients
3 cups all-purpose flour
2 cups sugar
1 teaspoon baking soda
½ teaspoon ground nutmeg
½ teaspoon ground cinnamon
½ teaspoon ground ginger
½ teaspoon salt
¾ cup butter, softened
2 cups mashed bananas
1 cup pitted and chopped dates
¼ cup orange juice
3 eggs
2 teaspoons vanilla
1 cup chopped cashews

Instructions
  1. Preheat oven to 325F. Grease and flour a 10 inch fluted tube pan
  2. In a small bowl, combine chopped dates and orange juice
  3. In a mixing bowl, combine flour, sugar, baking soda, nutmeg, cinnamon, ginger and salt

4. In another mixing bowl, beat butter for 30 seconds at medium speed using a electric mixer.

5. Add bananas, eggs, vanilla and the orange-date mixture to the beaten butter and beat till well combined.


6. Add all the flour mixture and beat at low speed till combined.


7. Beat at medium speed for a minute


8. Fold in the chopped cashews

9.Pour the batter into the prepared pan and bake for 75 minutes or till a wooden toothpick inserted towards the center comes back clean.

10.Cool the cake in pan on a wire rack for 10 minutes

11. Remove the cake from the pan and cool thoroughly

I never change or substitute ingredients when it comes to cakes. Today's experiment was new to me. I was very happy with the cake. It was moist and sweet. It did taste a bit like banana bread.

Here is the final cake,